Getting started with winget
Windows Package Manager
In 2020 Microsoft came out with its package manager. It took them a while but the number of applications you can install from it is outstanding. Winget is very similar to the 3rd party package manager Chocolatey.
This post will go over 4 items:
The main command options of Winget
How to search and then install a single application
How to show all the applications you have installed using Winget
On screen
In a file (JSON)
How to automatically upgrade all the applications through Winget
One of the coolest abilities is exporting all the application names from one computer to a JSON file. Then use that JSON file on the new machine to install all the same applications on the new machine. I will go over this in a separate future article.
The main commands of Winget
There are a few commands that will help if you know before going on
search - Find and show basic info on packages
install - Installs the given package
uninstall - Uninstalls the given package
upgrade - Shows and performs available upgrades
list - Display installed packages
upgrade - Shows and performs available upgrades
export - Exports a list of the installed packages
import - Installs all the packages in a file
download - Downloads the installer from a given package
repair - Repairs the selected package
How to search and install a single application
Typically if I want to install something, I first check and see if I can install it through Winget. Let us use one of my favorite screenshot applications “ShareX” as an install example. Here are the 2 steps you should use:
Search for the application and make sure to note the application “ID”.
Then install the application using the ID from step #1.
Open up a command prompt or PowerShell console.
winget search ShareXThat command will output this information to the screen:
Name   Id            Version Source
-------------------------------------
ShareX 9NBLGGH4Z1SP  Unknown msstore
ShareX ShareX.ShareX 16.1.0  winget
As you can see, the “ID” we will want to use is “ShareX.ShareX”. This will allow us to install it from winget. We could also use the ID “9NBLGGH4Z1SP” to install the software from the Microsoft Store however I prefer the Winget repository. We will need to run the command:
winget install ShareX.ShareXThe command’s output will look like this on the screen:
Found ShareX [ShareX.ShareX] Version 16.1.0
This application is licensed to you by its owner.
Microsoft is not responsible for, nor does it grant any licenses to, third-party packages.
Downloading https://github.com/ShareX/ShareX/releases/download/v16.1.0/ShareX-16.1.0-setup.exe
  ██████████████████████████████  39.1 MB / 39.1 MB
Successfully verified installer hash
Starting package install...
Successfully installed
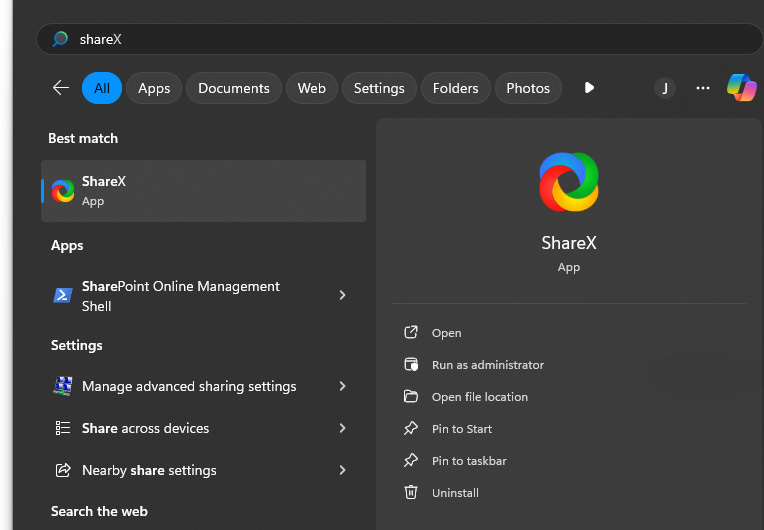
If you were to open the start menu and search for the app, you could see that it has been installed in a couple of seconds!
How to show all the applications you have installed using Winget
On screen
To show just the applications that you have installed using Winget you will need to run this command in a PowerShell console. This will NOT work in a command prompt.
(winget list) -match ' winget$'In a file (JSON)
You can export a list of applications inside a JSON file. This command can be run in PowerShell or a command prompt. Please Note. The folder that you want to save the file to MUST exist before running the command.
In this example, I made sure “C:\bin\export” was created before running the command below:
winget export -o C:\bin\export\winget-export.json -s winget --nowarnThe file will have a similar look to this:
{
	"$schema" : "https://aka.ms/winget-packages.schema.2.0.json",
	"CreationDate" : "2024-10-12T11:47:41.819-00:00",
	"Sources" :
	[
		{
			"Packages" :
			[
				{
					"PackageIdentifier" : "7zip.7zip"
				},
				{
					"PackageIdentifier" : "Docker.DockerDesktop"
				},
				{
					"PackageIdentifier" : "ShareX.ShareX"
				}
			],
			"SourceDetails" :
			{
				"Argument" : "https://cdn.winget.microsoft.com/cache",
				"Identifier" : "Microsoft.Winget.Source_8wekyb3d8bbwe",
				"Name" : "winget",
				"Type" : "Microsoft.PreIndexed.Package"
			}
		}
	],
	"WinGetVersion" : "1.8.1911"
}
You can see there are two applications that had been installed with Winget:
7zip
ShareX
How to automatically upgrade all the applications through Winget
If you were to run the command:
winget upgradeThis command will only show you the items that need upgrading. It will also show you what its current version is and what you can upgrade to.
Name               Id               Version          Available      Source
-------------------------------------------------------------------------------
7-Zip 19.00 (x64)  7zip.7zip        19.00            24.08          winget
As you can see 7-zip is only at version 19.00.
There are two ways to upgrade the software. you can do it one at a time or you can upgrade the outputted items all at once.
The latest version of the software is 24.08. To update “just” 7-zip I would type:
winget upgrade 7zip.7zipThe output from the command will look like this:
Found 7-Zip [7zip.7zip] Version 24.08
This application is licensed to you by its owner.
Microsoft is not responsible for, nor does it grant any licenses to, third-party packages.
Downloading https://7-zip.org/a/7z2408-x64.exe
  ██████████████████████████████  1.54 MB / 1.54 MB
Successfully verified installer hash
Starting package install...
The installer will request to run as administrator, expect a prompt.
Successfully installed
If you notice that there are a bunch of applications, that need upgrading you could run this command and it will update everything:
winget upgrade --allNOTE - I do recommend running Powershell or CMD prompt as admin to prevent having to click “YES” at each of the User Access Control (UAC) prompts and give permissions to allow the software to install.


