

How To - Clone A GitHub Repo In VSCode

Prerequisits
Install Git
winget install git.git --accept-source-agreementsReboot the machine; otherwise, the commands below will NOT work.
Setup Git
git config --global user.name "FirstName LastName"
git config --global user.email "email@domain.com"
I like to create a folder called:
C:\gitThis folder will house VScode Workspace as well as all clones from Github and Microsoft DevOps
Install VS Code
winget install Microsoft.VisualStudioCode --accept-source-agreementsCreate a Workspace In VS Code
Click:
File - Save Workspace As
Save the file to:
C:\git\workspace.code-workspaceWhy Is This Post Important
When you first open VS Code, there is a large button that prompts you to clone a GitHub repository. Once you clone a GitHub Repository, that button disappears, and it becomes harder to find how to add a second repository.
I will show you how to add a repository, regardless of whether you have zero repositories cloned or a hundred.
Get Git Repository URL
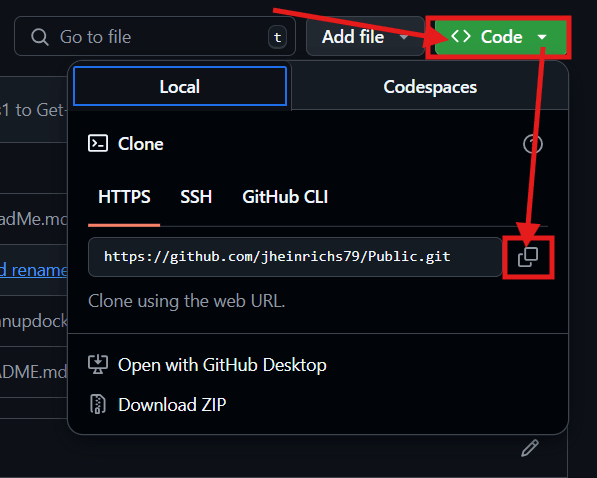
The first step is to locate the Repository you want to clone. Let’s go and use my public GitHub repo for HomeServarr.
On the page, click on the big “Green” code button and copy the URL.
Go into VS Code and hit the Key Combo:
CTRL+ALT+PThis will open the command palette. In the command palette type:
git cloneand select GIT: Clone
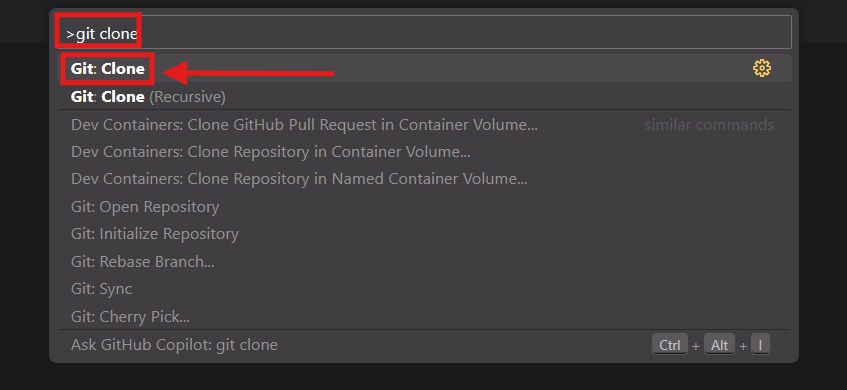
You will be asked to enter the URL that you copied from a previous step.

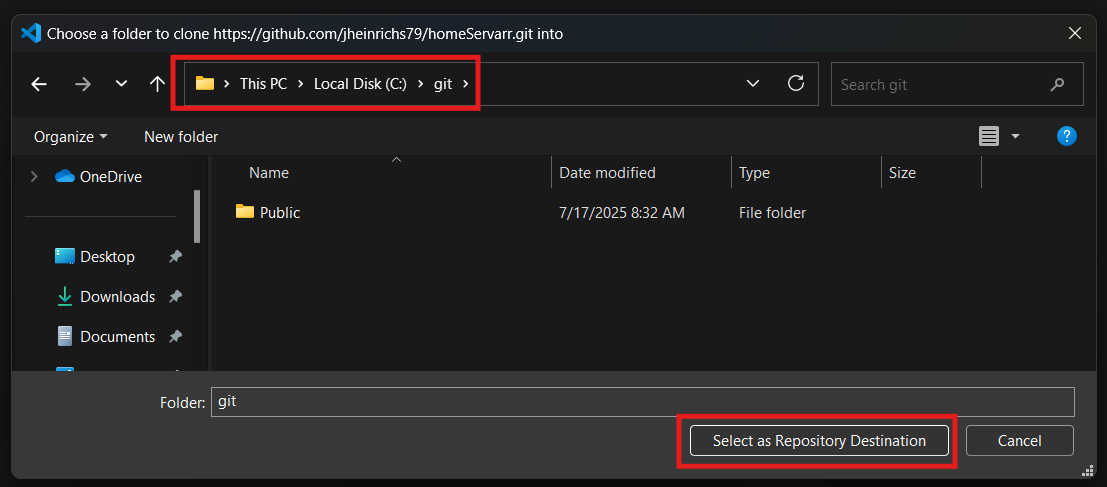
Then click on “Clone from URL” and the URL you entered. You will then be asked where you want to clone the repo to. Select C:\git again.
Click “Add to Workspace.”
And you are done. Now you can go back and repeat the same process for each GitHub Repository that you would like to clone. Using this method provides a consistent way to add multiple repositories in Visual Studio.