


How To - Plan and Build A PFSense Firewall

This is the first post of a two-part series. The second post will be added to this page when completed. Stay tuned!
Home networks are becoming more complex, and the line is blurring between home and small business setups, thanks to work from home. PFsense runs on FreeBSD, which doesn’t support hardware as well as Linux. FreeBSD tends to be a fairly robust operating system, both in terms of security and when the hardware is well-supported.
Hardware Requirements
These are the hardware requirements. You will need to select something that supports the speeds of your internet service provider plan. If this info is “too much” for you, please skip and go look at what I am using. It is fairly cost-effective and would allow you to follow along fairly easily.
General Requirements: Minimum
CPU - 500 Mhz
RAM - 512 MB
Recommended
CPU - 1 Ghz
RAM - 1 GB
Requirements Specific to Individual Platforms: Full Install
CD-ROM or USB for initial installation
1 GB hard drive
Network Speeds
10-20 Mbps
A modern (less than 4-year-old) Intel or AMD CPU clocked at 500MHz or greater.
21-100 Mbps
A modern 1.0 GHz Intel or AMD CPU.
101-500 Mbps
No less than a modern Intel or AMD CPU clocked at 2.0 GHz.
Server-class hardware with PCI-e network adapters, or newer desktop hardware with PCI-e network adapters
501+ Mbps
Multiple cores at > 2.0GHz are required.
Server-class hardware with PCI-e network adapters.
FreeBSD Hardware Requirements
Downloading the Software
To get pfsense, you will need to start on this link:
https://shop.netgate.com/products/netgate-installerMake A Bootable USB Drive
You will want to download the installer file that should be named similar to this:
netgate-installer-amd64.iso.gzPFsense has a pretty complete and awesome tutorial on how to make a USB Boot stick
https://docs.netgate.com/pfsense/en/latest/install/write-memstick.htmlPlanning
One of the most important things you can do is to have a plan in place.
Physical Setup and Connections
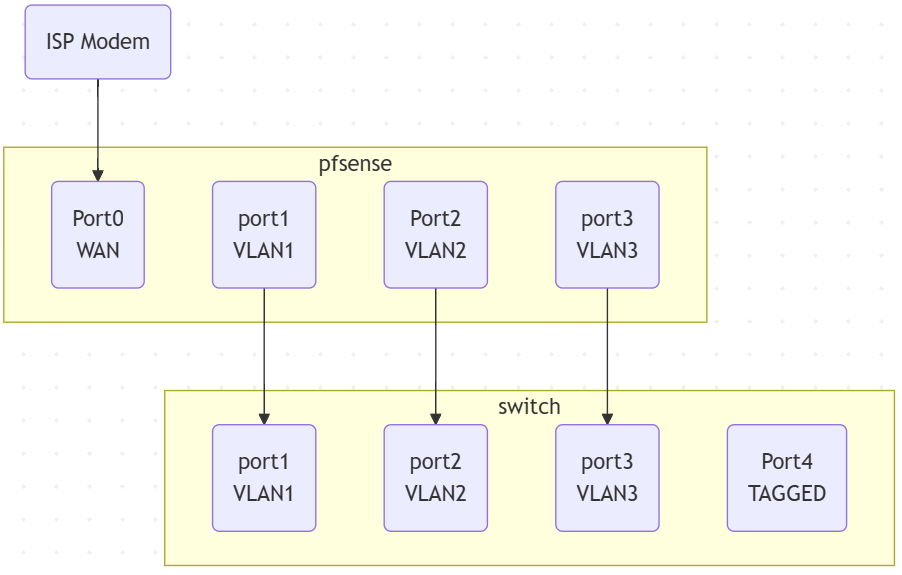
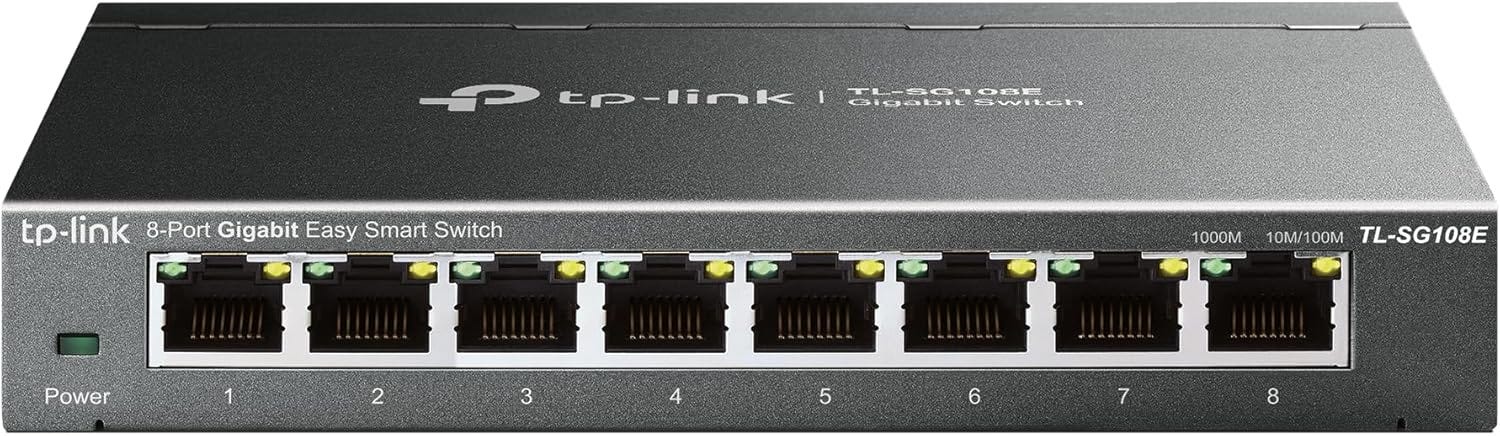
Choose A Switch with VLANS
For home use, these TP-Link switches have been rock solid. In my home setup, I will be using 2 of these. One by the firewall and one in my office. The cost and features will provide you with everything you need in a home and a small office environment.
TL-SG108E
Choosing the right Computer
I recommend scooping up a cheap mini computer off Amazon, eBay and other similar stores. HP, Dell and Lenovo all make great small and low-powered devices. It should have at least 8GB of RAM, also allowing you to install a third-party network card. In my build, I chose an Intel i5 processor.

Choosing the right Network Card
While you can actually make a firewall with only one NIC if your switch supports VLANS, I would highly recommend for the best performance to get something like this:
Intel I350-T4V2 i350-T4 PCIe x4 Ethernet Adapter NIC
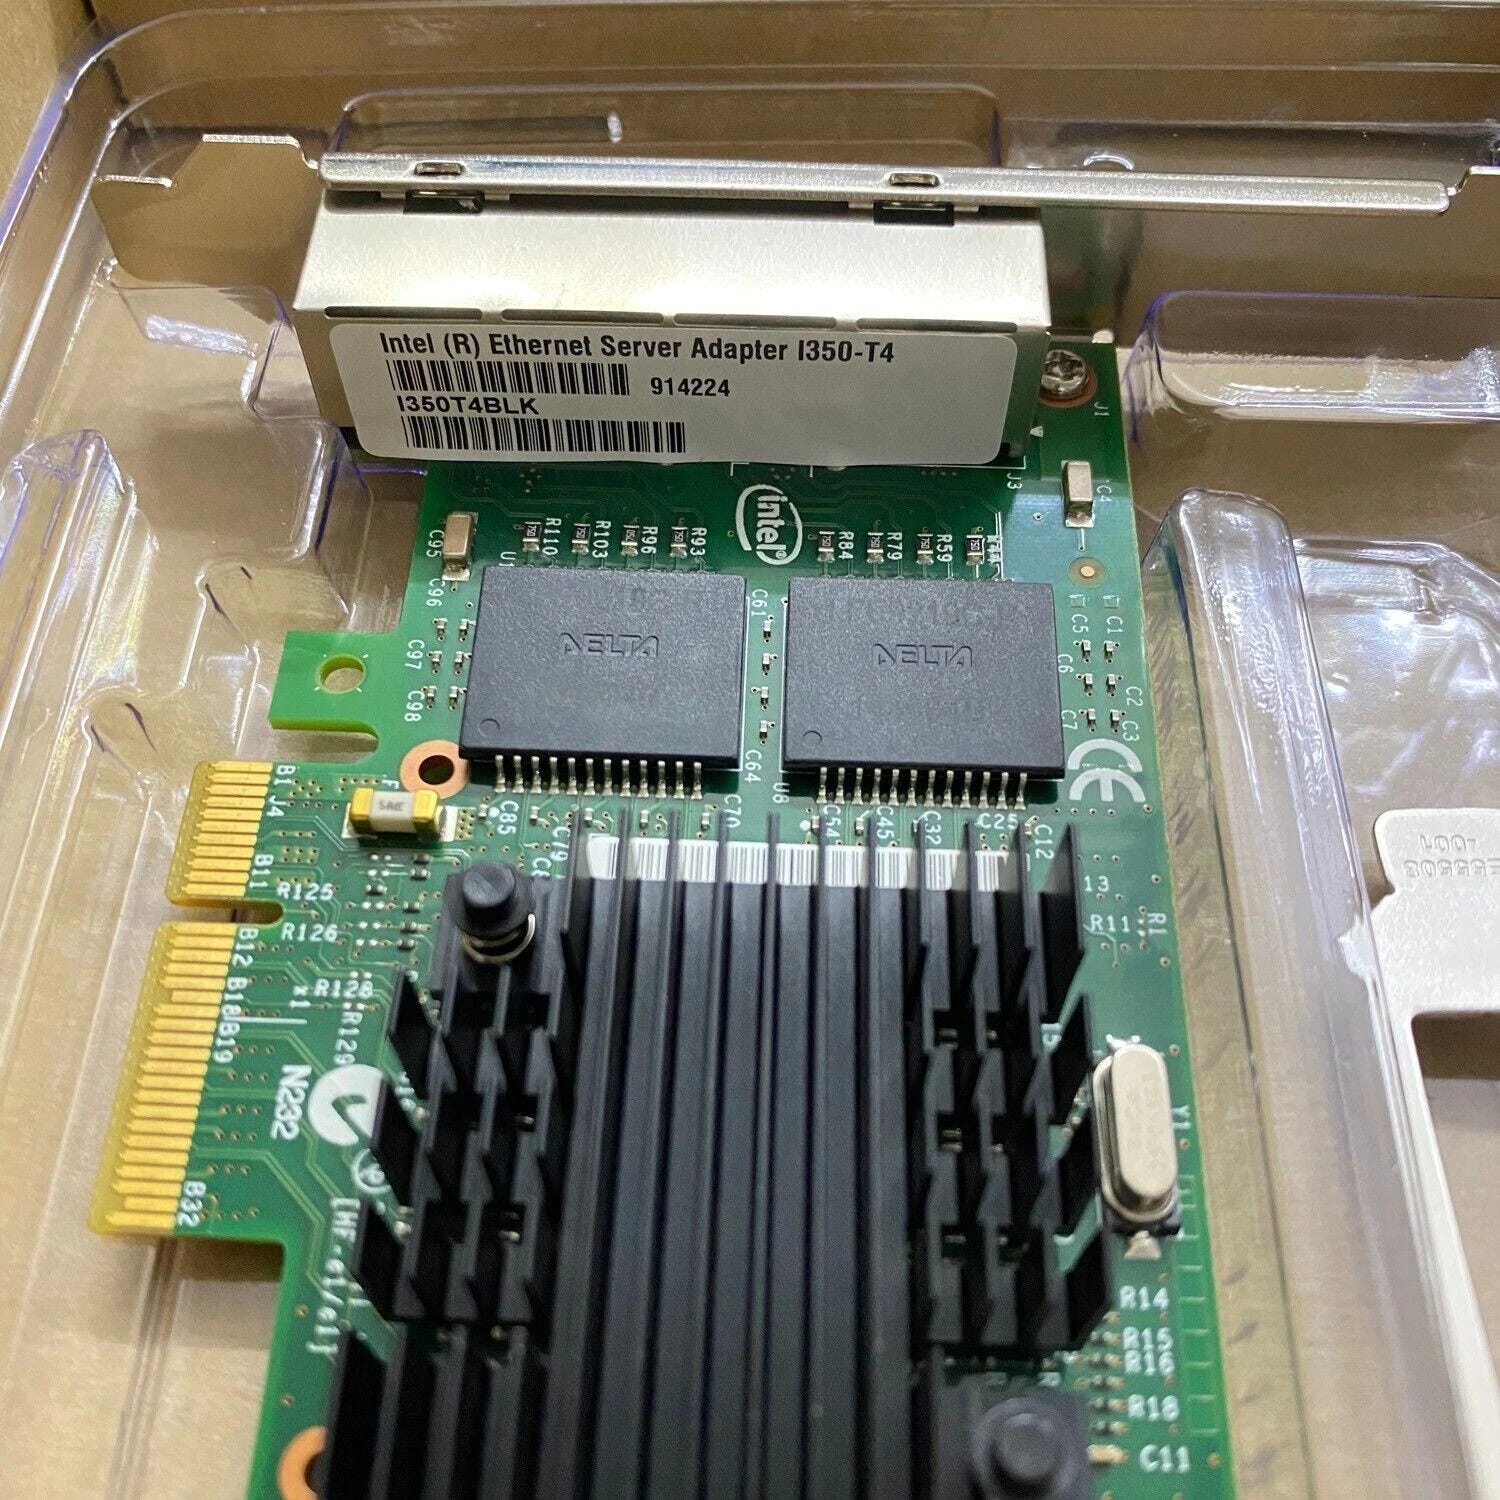
Having multiple Intel NICs will make the process much easier and provide the best possible performance. This adapter also supports low-profile installations, which are often found in Mini and low-powered PCs. It also comes with a converter bracket if you need full height.
In my house, I will be using these 4 networks:
Internet
Provided by the ISP
Main Home / Wireless network (/w Pihole)
All home servers, printers, and wireless connections will go here.
Will use PiHole for DNS to block many online ads at the DNS level.
IOT network
A wireless network where all IoT devices can connect to the internet and talk to each other, but can’t spam or reach your home network.
Guest / Corp network
Devices can access the internet, but aren’t allowed to talk to each other.
Corporate machines are increasingly starting to scan your home networks to keep the corporate network safe. Having your machines separated helps ensure the separation between home and work.
Networking
Now that you know you will have 3 networks, let’s plan it out. We will need to use 4 IP networks:
Internet: DHCP
NIC Port 0
Address: DHCP
Home Network: 192.168.101.x /24
NIC Port 1
Address: 192.168.101.1
Subnet: 255.255.255.0
IOT Network: 192.168.102.x /24
NIC Port 2
Address: 192.168.102.1
Subnet: 255.255.255.0
Guest / Corp Network: 192.168.103.x /24
NIC Port 3
Address: 192.168.103.1
Subnet: 255.255.255.0
There may be additional networks we want to use, such as connecting to NordVPN, a site-to-site VPN, or even a Tailscale network. At some time, I might go into some of these virtual network setups.
VLANS
Internet: VLAN 100
Home Network: VLAN 101
IOT Network: VLAN 102
Guest / Corp Network: VLAN 103
Now that you have done your planning, let’s go and install the PFsense software. I recommend only setting up the WAN and the Main home network as part of the setup. The remaining settings will be configured in a graphical environment. This will save you many frustrations.
Once set up, you will need to connect to https://192.168.101.1
My next post will cover the actual setup of the pfSense firewall using this physical setup.