How To - Truly Understand What Microsoft Entra Permissions Are Given With Each Role (RBAC)
Enabling Roles
For most tasks, I think anyone who has been using Microsoft Entra and Role-based access control (RBAC) will have an ok understanding of what they do based on the name of the role.
QUESTION - How many of you know exactly what they can and can’t do?
What makes it tricky is that some roles can be named very similarly so selecting the correct role is important. It is even more important because tasks can be very time-consuming if you don’t select the correct role.
Resources you should know about
You should be aware of these resources; however, I recommend waiting until a bit later in the post to click on these links. I will refer to these links as “Link #1” and “Link #2” etc..
Microsoft Admin Center - Compare Role Assignments
Microsoft Learn - Azure Resource Providers
Microsoft Learn - Microsoft Entra built-in roles
Microsoft Learn - About Admin Roles
I believe numbers 1, 2, and 3 are the most useful, especially if you know this one little trick with #1.
What you need to know about Roles
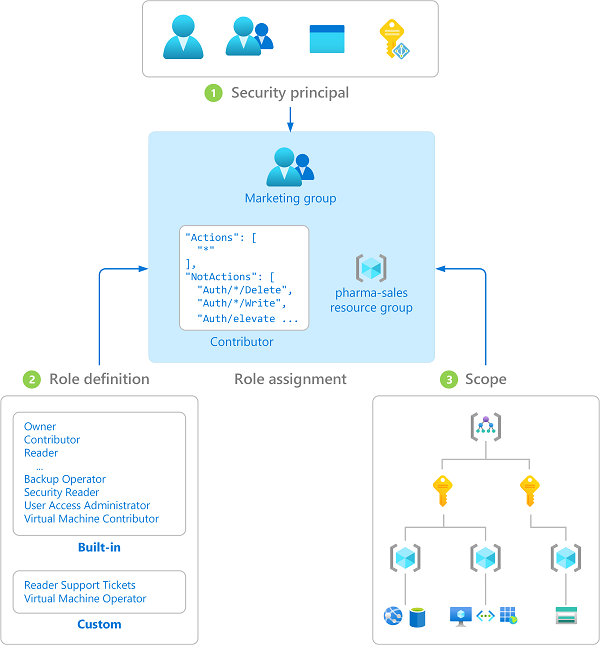
Roles are made up of Permissions.
Permissions can be made up of one or more permission strings.
Actions are what you can do with those permissions while the role is enabled.
These concepts are very important to understand!!!!
Terminology You Should Know
Azure resource providers
An Azure resource provider is a service within Azure that provides a set of REST operations allowing you to manage a specific Azure service, essentially defining the resources you can deploy within your Azure account, like creating virtual machines through the "Microsoft.Compute" resource provider or managing storage through "Microsoft.Storage".
Permission Strings
Refers to a specific text format used to define the exact actions a user or application can perform on a resource, typically within the context of Azure Role-Based Access Control (RBAC); Each part specifies the:
company,
resource provider,
resource type, and
the allowed action on that resource.
Template ID
It is a unique identifier used to reference a specific Azure role definition, essentially a set of permissions that can be assigned to users or service principals within Azure, allowing them to manage resources based on the defined access level; it's a string of characters that uniquely identifies a particular role within Azure's Role-Based Access Control (RBAC) system, whether it's a built-in role or a custom one you create. It is comparable to the way a user GUID looks.
Azure Actions
Refers to a specific set of permissions granted within a role definition, essentially representing the operations a user can perform on Azure resources.
"Permission strings" are the textual representation of those actions, detailing the exact resource provider, resource type, and action allowed.
Permission Strings
Permission strings have the following format:
{Company}.{ProviderName}/{resourceType}/{action}Example:
In order to “Create a new user-assigned identity or update the tags associated with an existing user-assigned identity,” you will need to have this permission
Microsoft.ManagedIdentity/userAssignedIdentities/writeWhen creating custom Roles, you will need to be extremely proficient in understanding Permission Strings.
Permission Requirements for Microsoft Admin Center Compare Role Assignments
Link #1
To follow along, you must be part of a role with these permissions. The Global Reader Role has these permissions by default, so if you have that by default, you are good to go!
I was able to find out this information by using the Compare Role Tool in Link #1.
Microsoft Admin Center - Compare Role Assignments
Link #1
This tool has some limitations. The biggest limitation is that you can only compare up to 3 roles at a time. However, it allows you to compare both built-in and custom roles.
Trick Number 1
I normally find selecting Global Read, Global Admin, and then the role you want to better understand works the best.
This allows you to see the differences between almost all the permissions and what the role actually gives. It also shows what you can’t do unless you are a global admin.
Trick Number 2
Once you compare the permissions, you can export them to Excel. The web interface has many issues, such as the inability to copy and paste information in certain areas, so having the information in Excel can be a real lifesaver.
Having an offline list of these options is pretty handy. However, if the role's permissions change, the offline list will not be updated, so it might make sense to update or check the information periodically.
Microsoft Learn - Azure Resource Providers
Link #2
This portion of the website has a ton of great info; however, it has some quirks. I recommend clicking on the link I provided and then drilling down to the area you want more info on. Use the link link to reset the view and start over if you need to look up something else.
You can select “Permission” from the sidebar list and then the “Resource Provider” in the main window. The Azure Service column will explain where the permission applies in Azure.
Link - Azure Resource Providers
Microsoft Entra Built-in Roles
Link #3
Microsoft Entra built-in roles
This site will be a staple for you regarding any existing built-in Roles. Many companies use the default rules, but if you are using built-in rules, this site can display a lot of information on those roles.
One of the unique parts of this website is the listing of Template IDs (they look like a GUID). As you drill down through the roles, they will show you all the actions and definitions.
Microsoft is also currently previewing a new feature called “Privileged” and will display this extra info on this website.
Using the links and tips I laid out in this post should allow you to better understand how a role works, what actions you can take while the role is enabled and what resources the role has access to.


