

VS Code - PowerShell Development Environment Setup
The perfect Setup

Set Execution Policy
Run Powershell as Admin and run the following code to change the Execution Policy
Set-ExecutionPolicy -ExecutionPolicy RemoteSignedSoftware Install
Run command
winget install Microsoft.VisualStudioCode --accept-source-agreementsVs Code
Modules
-- Powershell
-- Monokai Pro
-- Remote WSL
-- Run in PowershellConfiguration
Workspace
Git
Run command
winget install Git.Git --accept-source-agreementsConfigure Git
Open Terminal and run these commands:
   git config --global user.name "FirstName LastName"
   git config --global user.email "email@domain.com"
Install PowerShell 7
Open CMD prompt as administrator
winget install Microsoft.PowerShell --accept-source-agreementsPowerShell Commands
Install Latest PSReadline
Install-Module PSReadLine -AllowPrerelease -ForceInstall PSReadline History
Set-PSReadLineOption -PredictionSource History
Install Secret Management
Install-Module Microsoft.PowerShell.SecretManagement,Microsoft.PowerShell.SecretStoreUpdate Powershell
TLS 1.2 Support
https://devblogs.microsoft.com/powershell/powershell-gallery-tls-support/
[Net.ServicePointManager]::SecurityProtocol = [Net.SecurityProtocolType]::Tls12
Install-Module PowerShellGet -RequiredVersion 2.2.4 -SkipPublisherCheck
VS Code Setup
Modules you need
Sync Repos
Folder Setup
C:\git
C:\Users\username\Documents\WindowsPowerShell\Modules
Copy Default Modules to this folder
VS Code Theme
Mokokai Pro
If you have never used Mokokai Pro before please look into it. You do not understand how amazing VS code will look until you use this theme. Mokokai Pro is a paid theme.
Visual Studio Code Setup
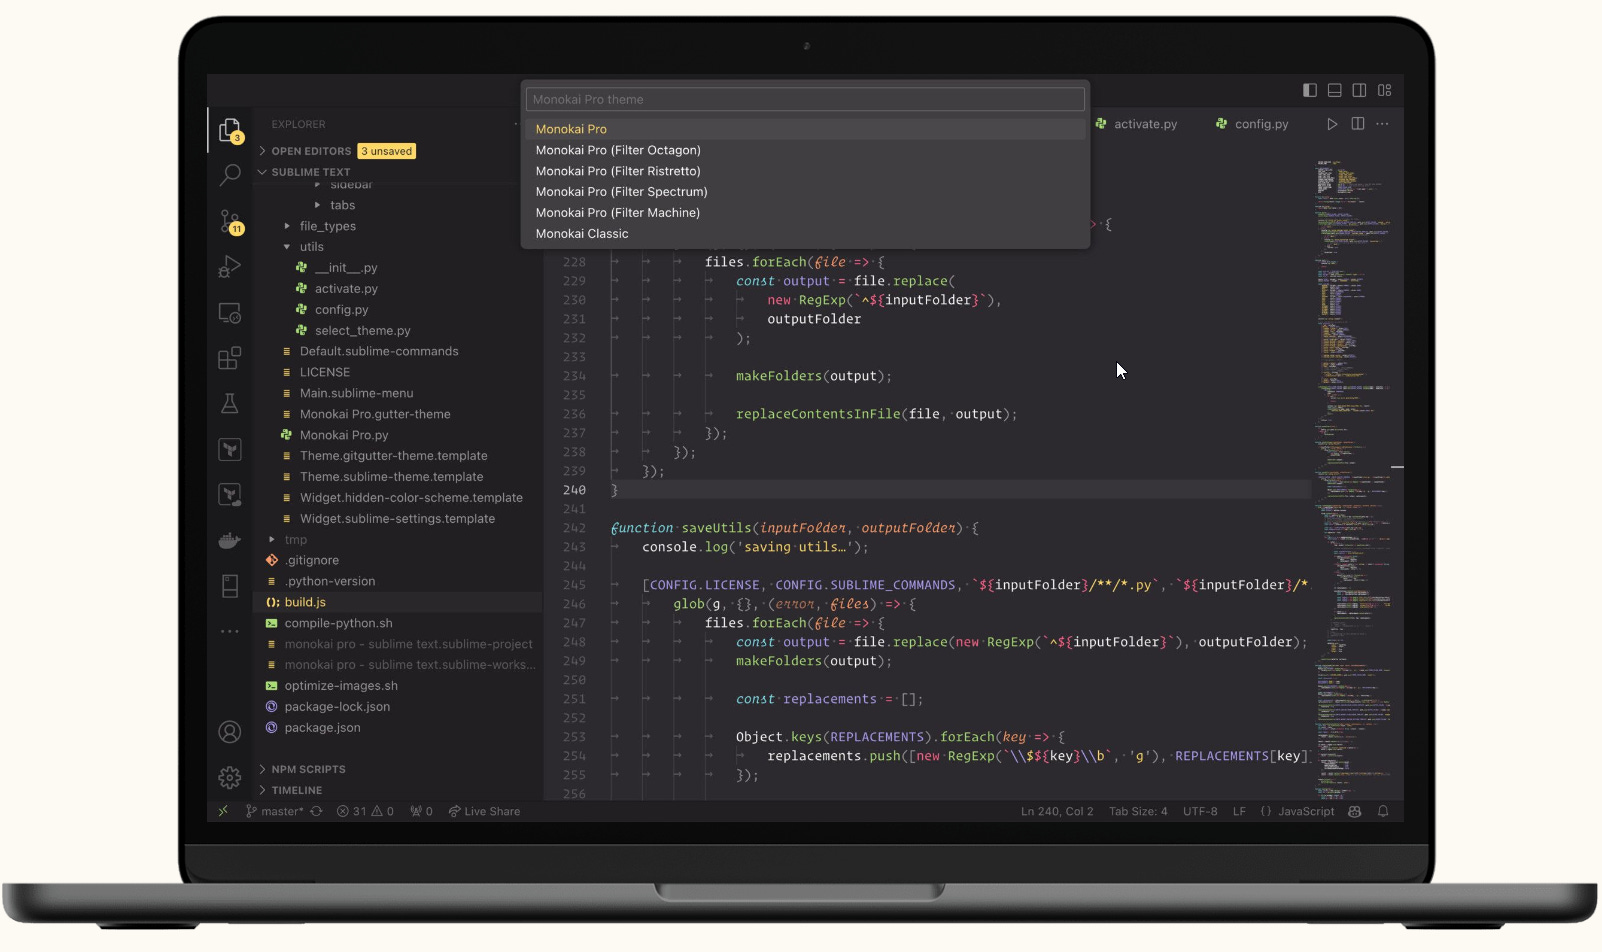
Open VS Code and ensure you have Monokai Pro installed. Then, press Ctrl+Shift+P to open the command palette. Search for Monokai Pro and select the option Monokai Pro - enter license. Then follow the prompts on-screen to enter your email and license key. You will then see a thank you pop-up message. You are now running an activated theme.
Open VS Code and ensure you have Monokai Pro installed.
Ctrl+Shift+P to open the command palette.
In the command palette select "Monokai Pro: enter license"
Fill in your email: email@domain.com
Fill in your license key: aaaaa-bbbb-ccccc-ddddd-eeeee
Powershell Profile
Powershell profiles allow you to do a bunch of things. One of the main things we will use profiles for is to automate the updating of custom modules.
The first thing to do is to check if you have a PowerShell profile. To do this run this command:
Test-Path $ProfileIf you get False it means it is not setup. To create a new profile you will need to run this command.
Note - This command will overwrite your old profile if you run the command!
New-Item –Path $Profile –Type File –ForceNow that you have the profile created, you will need to edit it. Run this command:
notepad $ProfileYou can add any command to start when you open a Powershell Window. In our case, I entered this command.
update-CustomModules -DriveLocation CHit save and open a PowerShell window. It should automatically run the command at startup!
Install Cascadia Font
To download a zip containing the latest version of Cascadia Code go to this website:
https://github.com/microsoft/cascadia-code/releases
The variants contained within are:
Cascadia Code: standard version of Cascadia
Cascadia Mono: a version of Cascadia that doesn't have ligatures
Cascadia (Code|Mono) PL: a version of Cascadia that has embedded Powerline symbols
For optimal rendering quality, we recommend using the TTF version on Windows and any other OS that employs TrueType hinting. The OTF version is supplied for users who prefer that format.
Once unzipped, open the font file—this will open a new window displaying the characters included in the font along with the font displayed at different sizes. This window should have an "Install" button that will install the font on your machine when clicked.
👉 Note: If you have previously installed a version of Cascadia Code, please uninstall the previous version before installing a new version. Not doing so can result in improper rendering. Please see the double install page if you should run into issues
Installing Cascadia Code in VS Code
Go to File > Preferences > Settings or hit Ctrl + , in VS Code.
Enter "Font Face" in search field.
Enter following in Font Face option: 'Cascadia Code', Consolas, 'Courier New', monospace
Enable Font Ligatures option available just below 'Font Face'.
Press Enter and you're good to go.
Note: If you've installed font and it does not get applied in VS Code, try restarting VS Code.
Errors
Package Management
https://www.powershellgallery.com/packages/PackageManagement/1.4.7
RUN POWERSHELL AS ADMIN

Install-Module -Name PackageManagement -force
If this command doesn't work you might have to run this command first:
[Net.ServicePointManager]::SecurityProtocol = [Net.SecurityProtocolType]::Tls12NuGet Update
RUN POWERSHELL AS ADMIN

Install-PackageProvider -Name NuGet
If this command doesn't work you might have to run this command first:
[Net.ServicePointManager]::SecurityProtocol = [Net.SecurityProtocolType]::Tls12